Wednesday, September 26, 2012

Purple chevrons

Hey everyone!
I hope you guys are having a great Wednesday! It's kind of rainy here but that's ok it's perfect sleeping weather :) 
So today I have some pretty purple and gold chevrons to show you guys. I used the wax paper method again and cut little strips in different widths using my craft scissors and put them on my nails using clear polish. This was a little time consuming but I really love how they came out!


Colors used:
- Sinful Colors Purple Diamond
- Sinful Colors Let's Talk
- Sally Hansen Golden-I
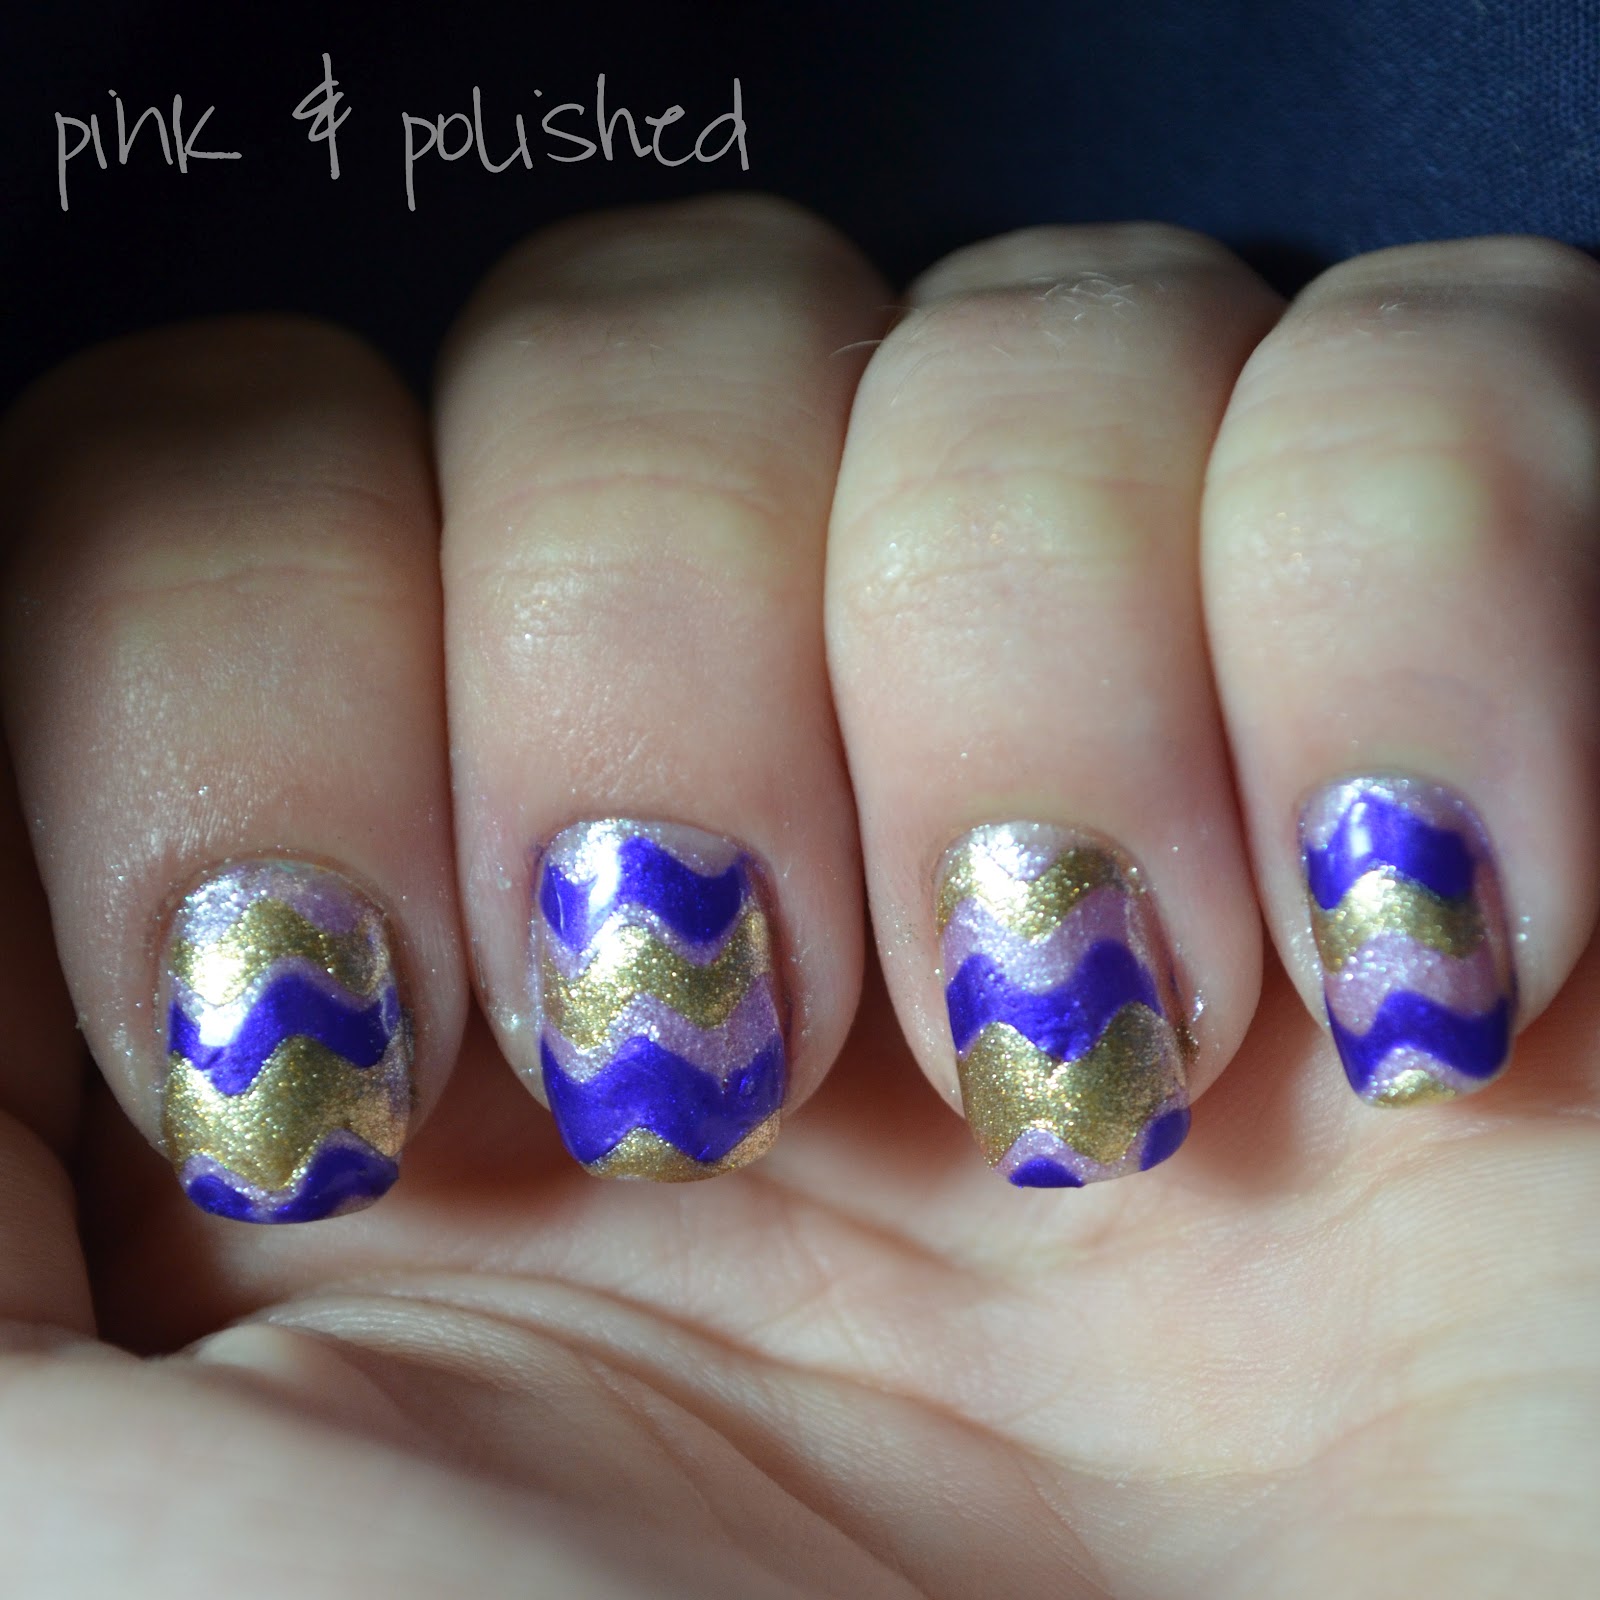


So what do you guys think? I think they kind of look like easter eggs I'm definitely going to keep this design in mind when Easter comes back around.
Thanks for reading :)

Tuesday, September 25, 2012

What a Hoot!

Hi everyone! 
I hope you guys are having a good week so far I'm definitely enjoying my day off today :) Sorry for the lame title I just couldn't think of anything good haha. Alright so this is one of my first attempts at all free hand nail art and they say practice makes perfect and that is so true here! It's not perfect but when my boyfriend's cousin Amy sent me a link on facebook I knew I had to recreate it it was so cute! I changed the colors up a little bit I just love this minty Sinful Colors I picked up the other day. So here you guys go! I hope you like my minty owls :)

Oh and please ignore my pointer finger it got smudged :(


Colors used:
- Sinful Colors Mint Apple
- Finger Paints Paper Mache
- Sally Hansen Black Out


What do you guys think? I can't wait to do some more free hand nail art so I can improve some more!
Thanks for reading :)

Monday, September 24, 2012

Very first saran wrap nails!

Well hello again!

So after I did my bff's nails I decided to try something new on my own. I've been seeing the saran wrap method pop up all over the place and I have to say I've got a love/hate relationship with it. I wanted to do something for fall so I thought I would put some red, yellow, and copper together and maybe it would look like fall leaves :) The results are ehhhh in my opinion. I do like them but they aren't like anything I've ever worn so they take a little to get used to. So here you guys go, my fall, smudgy, water-colory nails...


Colors used:
- China Glaze Harvest Moon
- Sally Hansen Mellow Yellow
- Ms. Pedicure Red


It was pretty easy to create I just painted my nails with China Glaze Harvest Moon and let them dry completely. Then once it was dry I put a blob of Sally Hansen Mellow Yellow and a blob of Ms. Pedicure Red next to each other on a flat surface. I crumpled up some saran wrap and dabbed it in the colors and a couple times on my surface to get some of the polish off. After that I dabbed a couple times on my nails until I was happy with how they looked. 

So what do you guys think yay or nay? I'm still a little undecided. 
Thanks again for reading :)

Guest fingers with Lisa!

Hello all!
Before I show you guys my design for the day I'd like to show you the design I did on my best friend Lisa :) You'll be seeing her pretty little nails on this blog often since we love to get together and polish all day! So... judging from my recent obsession with gradients can you guys guess what I did to her nails? No? Well surprise surprise don't these look a little like gradients?? Sorry guys I just can't shake this obsession!


Colors used:
-Sally Hansen Diamond Strength Save the Date
-Sinful Colors Mint Apple


I never would have put these two colors together but after I put them on her nails I think they look so good together! Leave it to Lisa to find new color combos for me :)
So what do you guys think? Do you love this color combo?
Thanks for reading :)

Sunday, September 23, 2012

Oh No!

Uh oh! Look what happened when I was closing a window! 
*Warning you are about to see some stainedddd nail* :(


I don't want any nubbins!

But funny story about this. Earlier today my boyfriend and I were going out to get some lunch and we were going right past a Sally's and you know I had to make him stop so I could go in especially with the clearance sale going on! So I was perusing the aisle/ clearance when my eye caught Orly Nail Rescue. I've seen this featured on a couple of blogs that I follow so I was like, ya know what? I should pick this up "just in case" I ever need it. Who would have thought I'd be using it the same day I bought it? Not me! Haha! I figured I'd photograph the process while I was at it...


All of the supplies come in a cute little box :)


And heres all the supplies you'll need to fix your nail.

Nail Glue
Repairing Powder
Nail Buffer
Ok so first you're going to take all of your polish off of your nail. Then you're going to add a thin layer of nail glue over your entire nail. I sort of broke the rules here and only applied it to the cut in my nail O.O shhhhh don't tell! After that your going to immediately dip your nail into the nail repair powder and tap off the excess...

After dipped into the nail repair powder
Your nail should look something like this ^. After the powder has dried you take your nail buffer and buff your nail until it's one even surface. I applied my base coat before taking the next picture...


And there you have it! Good as new! The instructions say to remove the product soak your nail in acetone so I assume as long as you use non-acetone nail polish remover you can paint and repaint your nails as much as you want.


And here's the finished product you can't even tell I broke my nail :) This is definitely a must-have if you want to keep from getting the dreaded nubbins I am SO glad I decided to pick this up today!

Thanks for reading guys :)


Wax paper manicure

Hello all!

Alright so a while back there was a trend going around called the plastic bag method for nail art where you paint nail polish on a plastic bag and when it's dry you can cut it and put it on your nails. Sorry thats a really awful explanation lol! But anyways I wanted to try it and unfortunately it didn't work out so well for me :( Then I heard that some people were using wax paper instead because it was easier to pull the nail polish off after it was dry. So I tried it that way and POOF! It worked! So without any further ado... I present my very first successful wax paper nails!


I was surprised at how much easier this was for me. I just painted on my nail polish and let it dry over night. The next day I peeled it off and cut it with my craft scissors. After a while I thought they needed some dots though :)


Colors used:
-Petites Baby Blue
-Sally Hansen Blue It
-Sally Hansen White On


I love how the blue looks like waves on my nails. What do you guys think?
Thanks for reading :)

Saturday, September 22, 2012

Sending some momma love!

Hi again! 
So my mom is basically my go to guinea pig for nail stuff I want to try. She's the best :) 

Ok, so I really like french tips but at the moment my nails are WAY too stained to do it :( I always noticed when I used to go get my nails done in a salon how the people would do french tips, they would paint the end of the nail and then go back with a brush dipped in acetone and work back to the smile line. Of course you guys know I needed to try it that way and my mom was kind enough to let me try it on her! So here you go!


It also gave me a chance to use an new China Glaze I picked up in the clearance section of my local Sally's: Harvest Moon. I LOVE the color! Its the perfect coppery fall color. After a while though I thought her nails needed a little more oomph so I added a black line with my Kiss Nail Art polish in Black and I tried my first attempt at stamping! You can't really see it but I used a plate that I got off of ebay I don't know the exact brand but on the plate it says m04. It's a cute little leaf design that I used as an accent nail. 


So sad the glare makes it so you can't see it :(


I really like using my brush to go back and push the polish to the smile line it creates a nice crisp line! Thanks again mom for letting me use your hands! What do you guys think?
Thanks for reading :)