Showing posts with label pastel. Show all posts

Tuesday, June 16, 2015

Pastel Circular Dotted Nails

Time to change it up!

I've been doing a lot of neon stuff lately I think it's time to switch it up with some pastels <3

Pastels are generally a "springtime" shade but eff the rules! We can wear whatever polish in whatever shade whenever we want! Who's with me?!?

Anyways ;) I thought I'd go for a fun a simple look with this cute little dotted design. Check it out!

I started off with a different base on each nail: Lime Crime Parfait Day (pink), Crema De Limon (yellow), Lavendairy (purple), and Azature Light Blue Diamond (blue). I used a small dotting tool and all of these colors plus Essie Blanc for the dots and alternated the colors with each nail. To finish it off I sealed them all in with a layer of Seche Vite.


This look is so soft and sweet! It's almost refreshing after all of the neons and bright saturated colors. I don't normally do a different color on each nail but I'm learning to expand my horizons and I'm loving it! The possibilities are endless ;)

What do you guys think?

Thanks loves! :)

Sunday, April 5, 2015

Happy Easter!

Happy Easter guys!

I hope you're all having a wonderful day with friends and family!

I wanted to do something fun for my Easter nails this year so I decided to go with Easter egg tribal nails! I so love how these came out let me know what you guys think!

I started off with a base of Sinful Colors Snow Me White. When it dried I created all of the designs with various colors of acrylic paints. I sealed it all in with a layer of Seche Vite and added a final layer of NYC Matte Me Crazy for a flat finish.


This color combination is so fun and springy I really enjoyed wearing these on my nails! What do you guys think?

What are you doing for Easter this year?

Thanks loves :)

Friday, March 20, 2015

Rainbow Pastel Half Moon Nails

Hey guys! 

I'm so happy that I'm getting back into doing gradients. I really wish I didn't wait so long to go out and buy more cosmetic sponges because I honestly forgot how much I loved this technique. It's so versatile, there are so many different things you can do, radial gradients, vertical, horizontal, spot. The list goes on! I'm sure I'm probably boring you guys with my rambling so let's get on with the real reason you guys are here... NAILS!

Okay I started this look off by applying hole reinforcement stickers at the top of your nails near the cuticle. Then I placed a piece of tape over the small hole in the stickers so that no polish would leak through there. Then I applied my polishes to my cosmetic sponge to create the gradients. The colors I used were: Essie Boom Boom Room, Lime Crime Peaches <3 Cream, Lime Crime Crema De Limon, OPI You're Way Outta Lime, and Essie Rock The Boat. I sponged on the gradients, peeled off the stickers and applied a layer of H&M Jo is in the House over just the gradients. Then I outlined the top of the half moons with OPI This Gown Needs A Crown. I sealed all of that in with a coat of Seche Vite and finally added a heart rhinestone to each nail.  


These took FOREVER! But it was so worth it because I'm obsessed with the outcome! It's so girly and sparkly and just so many things that I love. They make me think of spring time and warmer weather and right now that's just what I need ;) 

Keep an eye out on my Instagram and YouTube channel for tutorials on this look a little later today!

What do you think guys?

Thanks loves :) 

Sunday, March 1, 2015

Pastel Spot Gradient with Stamping

It's gradient time!

It's been so incredibly long since my last gradient manicure which makes me so sad because I love gradients! Truth is I ran out of my cosmetic sponges and have been way to lazy to buy more... oops T.T But I've finally got some so let's kick off what I'm sure will be a plethora of gradient designs with this fun, springy, pastel spot design with some contrasting stamping on top. 

I started off with a base of Sinful Colors Snow Me White. I then applied some liquid latex around my nails (watch out for this fun neon pink liquid latex to be available in my shop SOON!) I then took a cosmetic sponge and added splotches of Essie Nice is Nice, Lime Crime Pastelchio, Lime Crime Once In A Blue Mousse, Lime Crime Parfait Day, and Lime Crime Peaches <3 Cream. Once everything was dry I stamped over each nail with WetnWild Black Creme and Bundle Monster plate BM-721. I peeled off the liquid latex, cleaned up around my nails and applied a coat of Sech Vite to finish off this design.


I love the way that these spot gradient designs come out, so unique and each nail never looks quite the same. This design is so springy I can almost smell the fresh air... fresh air that isn't -10 degrees -_- Almost. 

I've also filmed a tutorial for this design so look for it sometime today on my Instagram account!

Thanks loves :) 

Monday, February 23, 2015

Ruffian with a neon twist

Haaaaaaaaaaappy Monday!

Another week is beginning and I couldn't be more excited! I'm finally officially starting my new job and it feels like I've been waiting for this forever! So this calls for some bright and fun nails! I haven't done a ruffian design in a while so I think it's high time to change that.

I started with a base of Lime Crime Once In A Blue Mousse and when it dried I created the ruffian using Color Club Over the Moon. Then I took a small nail art brush and used it to outline the ruffian using China Glaze Pool Party. To finish it off I sealed it all in with some Seche Vite. 


I so loved these nails! The holo and neon and pastel come together to make the yummiest combination. Don't you think? 

What about you guys, what's your favorite ruffian color combination?

Thanks for stopping by! Talk to you tomorrow!
Thanks loves :)

Friday, September 19, 2014

31DC2014 Day 19: Galaxies

Hey guys!

I'm going to keep this short and sweet because it's currently 11:00pm and I have to work tomorrow and I'm TIRED!! ;) 

It's day 19 of the 31 Day Challenge 2014... or at least it will be day 19 when I post this! And the theme is galaxies! Now I've done galaxies before so I thought I'd change it up and go with a pastel galaxy this time. Ready?

I started off with a base of Lime Crime Lavendairy. When it dried I tore up a cosmetic sponge and dabbed Lime Crime Parfait Day, Lime Crime Once In A Blue Mouse, and Lime Crime Lavendairy to create the galaxy. I added stars with Essie Blanc and a generous coat of China Glaze Fairy Dust to give it that super sparkle!! I sealed it all in with some Essie Good To Go and the design was finished. 


I'm not going to lie, I'm totally digging this pastel look! It's so sweet and soft and sparkly! My Lime Crime polishes were absolutely perfect to pull off this look and I know I'm going to revisit it some time soon! 

And now I want to see your galaxy nails! Post a link in the comments to your 31DC2014 galaxy nails so I can check them out!!

Alright it's time for me to go to sleep so goodnight..... errrr good morning suppose by the time I post this... oh now I'm all confused! ;)

Thanks loves :) 

Wednesday, September 10, 2014

31DC2014 Day 10: Gradient Nails

GRADIENTS. GRADIENTS. GRADIENTS!!!!

I've been waiting for this day! Side note: have you ever noticed that the more you spell something and look at it, the more it looks like it's spelled completely wrong? Strange ;)

Anyways... today is day 10 of the 31 Day Challenge 2014 and the theme is gradients! I'm not kidding when I said I've been waiting for this! Gradients are one of my absolute favorite types of nail art, and I really don't do them enough. I decided to go with a soft and sweet look this type with of course..... HOLO on top! :) 

I started off this Lime Crime inspired design with a base of Essie Blanc on all of my nails. After that I taped off around my nails and created the gradient using a cosmetic sponge and Lime Crime Parfait Day, Lime Crime Lavendairy, and Lime Crime Once In A Blue Mousse. I topped it off with my special holographic top coat from my The Little LacquerBean Halloween Collection. A layer of Essie Good To Go on top finishes off this look!


Wow, I'm in LOVE! I thought yesterday's rainbow nails were going to be my favorite but boy was I wrong! This one has definitely got the top spot so far! ;)

Make sure you keep an eye out for my Halloween release date and some sneak peeks of the rest of the collection by following me on Instagram (@thelittlelacquerbean) or following my store: 

Http://thelittlelacquerbean.storenvy.com

Okay guys it's your turn! Leave a link to your 31DC2014 gradient nails in the comments so I can see!!

Thanks loves :) 


Monday, January 20, 2014

Fabric swatch-spiration skittles

Mehhhhhh NUBS!!

Yeah you read that right.. NUBS! T.T I haven't had a bad break in a long time so I suppose it was about time. I snapped off my middle finger nail trying to pull up my covers on my bed. I won't repeat to you all the select words I decided to use when it happened.... I don't want to skew your view of me! ;) LOL Needless to say I wasn't a happy camper. So I filed my nails back down to nubs, my middle nail actually snapped the corner off lower then I could file but I tried to position my nails so that you couldn't quite see that part ;) 

Anyways, I was surfing the web looking for some nail inspiration and I have heard that some bloggers use fabric swatches for inspiration and I'm like "DUH" why haven't I tried that? -_- Sometimes I'm not the brightest crayon in the box... or ever ;) But hey what are you going to do?? One of the first things that came up was a pile of pastel yellow and gray fabric swatches with various patterns and I immediately fell in love. I didn't use all of the patterns on the fabric because I just wanted to run with the yellow / gray idea and I'm super excited about the out come!

I started with a white base of OPI Alpine Snow on my index finger. On my pinky and thumb I used E.L.F Misty Haze and on my middle and ring I used Lime Crime Crema De Limon. I used white acrylic paint for all of the details except for my index where I used E.L.F Misty Haze to create the chevrons. I top coated everything with a generous coat of Poshe and I was good to go :) 


How did I do camouflaging the break? With the exception of the middle picture of course.. I'm not really sure why I thought that was a good hand pose -_- lol! But I really loved the gray and pastel yellow color combination and I was so happy that all of the designs worked so well together! I know it's a little bit difficult to see the designs on the yellow nails, they were much more apparent in real life, but I like that it gives the finished product a soft look.

What do you think?
Thanks loves :)  

Tuesday, January 7, 2014

Pastel Negative SPACE Nails with tutorial

Negative space,

What can I say about it besides that it's awesome?! Many talented bloggers have played around with negative space and I thought it was high time for me to jump on that wagon! I had this really cool idea of negative SPACE nails and, even though it took forever, I made up a little tutorial for you guys! So keep on reading to find out how to create some pastel negative SPACE nails! 


TUTORIAL:
1. Gather your supplies:
    - you need a pink polish [Lime Crime Parfait Day], a purple polish [Lime Crime   Lavendairy], a blue polish [Lime Crime Once In A Blue Mousse], a green polish [Maybelline Color Show Green With Envy], a white polish [Azature White], and an optional glitter top coat [China Glaze Fairy Dust]
    - you will also need a small nail art brush, a toothpick or small dotting tool, a makeup sponge and small star hole punch and tape or star stickers
2. Cut out your stars using the hole punch and your tape.
3. Stick the star stickers to your nails, make sure you press all the edges down.
4. Paint your nails white.
5. Rip your make up sponge and sponge on your blue all over the nail.
6. Use another piece of ripped up sponge and sponge your white on randomly.
7. Sponge over the edges with your green.
8. Sponge on your pink in the white area.
9. Sponge over some of the pink with your purple.
10. Add white dots and stars using your white polish.
11. Layer on your holo top coat.
12. Carefully peel off star stickers with tweezers, you may need to fix up the stars using your brush and some acetone. 
13. Clean up your edges.
14. Add top coat.


Whew! I hope you found the tutorial at least a little bit helpful! ;) 

What do you think? Will you try out some negative space nails?
Thanks so much loves :) 

Saturday, December 29, 2012

Swatched: Lime Crime Les Desserts d'Antoinette

Good morning lovely people!

I'm sure many of you have heard of Lime Crime's line of nail polish, the lovely pastels that has the nail polish world drooling.... well me anyways ;) LOL Ever since I saw my first swatches of these babies I knew I had to have them! But I'm on the cheap side so I couldn't convince myself to spend that much money on little old me... well guess who got them for Christmas?! THIS GIRL :) Come see these pretties with me!


Ok first up is Lavendairy,

Lavendairy is a light purple pastel creme polish. It's definitely a shade that stands out as do the others! I was a little weary of the application because I read that some other bloggers said it was a little tricky. Lavendairy actually wasn't too bad on application... the first coat was a little streaky and it didn't self level very well but a nice coat of top coat smooths everything out anyways :) Below is three coats of Lavendairy and one coat of top coat. Three coats is probably best for full opacity. 


Next up is Crema de Limon,

Crema de Limon is a very pretty bright yellow pastel creme polish. I was happily surprised with this one. I find that most yellow polishes are streaky at best and a horror to apply... at least the ones I have are LOL. Crema de Limon is streaky with the first coat but builds up beautifully. This one also had some self leveling issues but like I said before nothing some good top coat can't fix. Below is three coats of Crema de Limon and one coat of top coat. Three coats is needed for full opacity here as well. 


Moving on to Milky Ways,

Milky Ways is a gorgeous nude / off white pastel creme polish. I absolutely love this one! It's a very pretty nude for my skin tone... maybe a little light but oh well! Milky Ways had the same application as the others but seemed slightly less streaky. Below is three coats of Milky Ways and one coat of top coat. Three coats are necessary for opacity. 


Next is Once in a Blue Mousse,

Once in a Blue Mousse is a light blue pastel creme polish. This one is probably my least favorite of the group. Don't get me wrong it's a very beautiful color but I just don't think it worked very well with my skin tone. In person this seemed to have a very light gray tone to it on me at least. Application was the same as the others. Below is three coats of Once in a Blue Mousse and one coat of top coat. Three coats are needed for opacity. 


Next in the line up is Parfait Day,

Parfait Day is a pink pastel creme polish and may be the most bubble gum-esque polish I've ever seen! Serious gorgeous-ness. I felt like Barbie wearing this one and loved every second of it ;) LOL Parfait Day had the same application as the others and needs three coats for full opacity. Below is three coats of Parfait Day and one coat of top coat. 


You better put your sunglasses on for the next one, Pastelchio, 

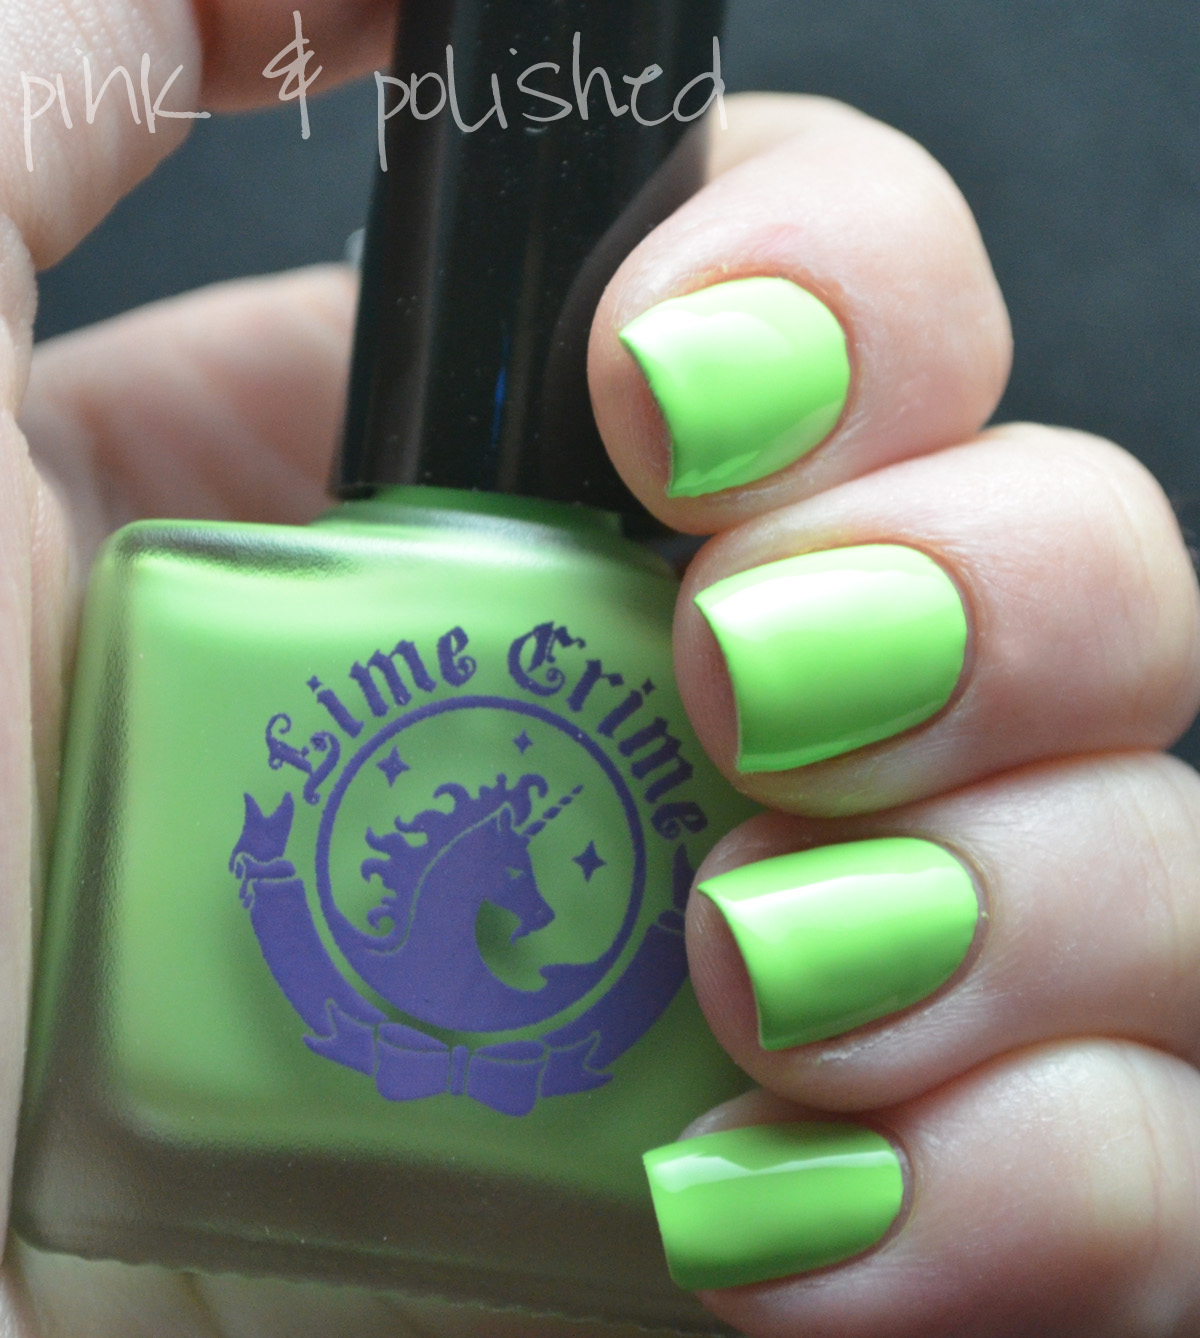
Pastelchio is a strange mix of neon and pastel... I didn't even know it was possible! LOL It's a bright green neon pastel creme polish. This one is the one I was looking forward to the most it's just so unique! I knew it would be my favorite and it definitely is. Application is the same as the others and also needs three coats for opacity. I could not stop staring at my nails when I put this on and I can't even tell you all how many compliments I got on them. Below is three coats of Pastelchio and one coat of top coat. 


Last but certainly not least is Peaches ♥ Cream, 

Peaches ♥ Cream is a very pretty orange/mango pastel creme polish. I find it very hard to find an orange polish that works well with my skin tone but had high hopes for this one. Looks like my suspicions were right, I love this color! It really stood out on my nails and didn't make my skin look all weird like most orange polishes do. Application is the same as the others and you need three coats for full opacity. Below is three coats of Peaches ♥ Cream and one coat of top coat. 


These polishes totally surpassed my expectations! And look at those bottles! I love the whole frosted glass look and the logo is too cute. If you haven't gotten any of the Lime Crime polishes yet I highly recommend them! It looks like a lot of them are sold out at the moment :( But I'm sure they'll be coming back in stock really soon!

So what do you guys think? Are pastel polishes in? 

Thanks for reading :)