Showing posts with label wet n wild. Show all posts

Friday, December 18, 2015

Duochrome Herringbone

Hi guys!

I am in LOVE with these nails! I always love the way duo chrome polishes look over black and it just pops with this design, so lovely <3

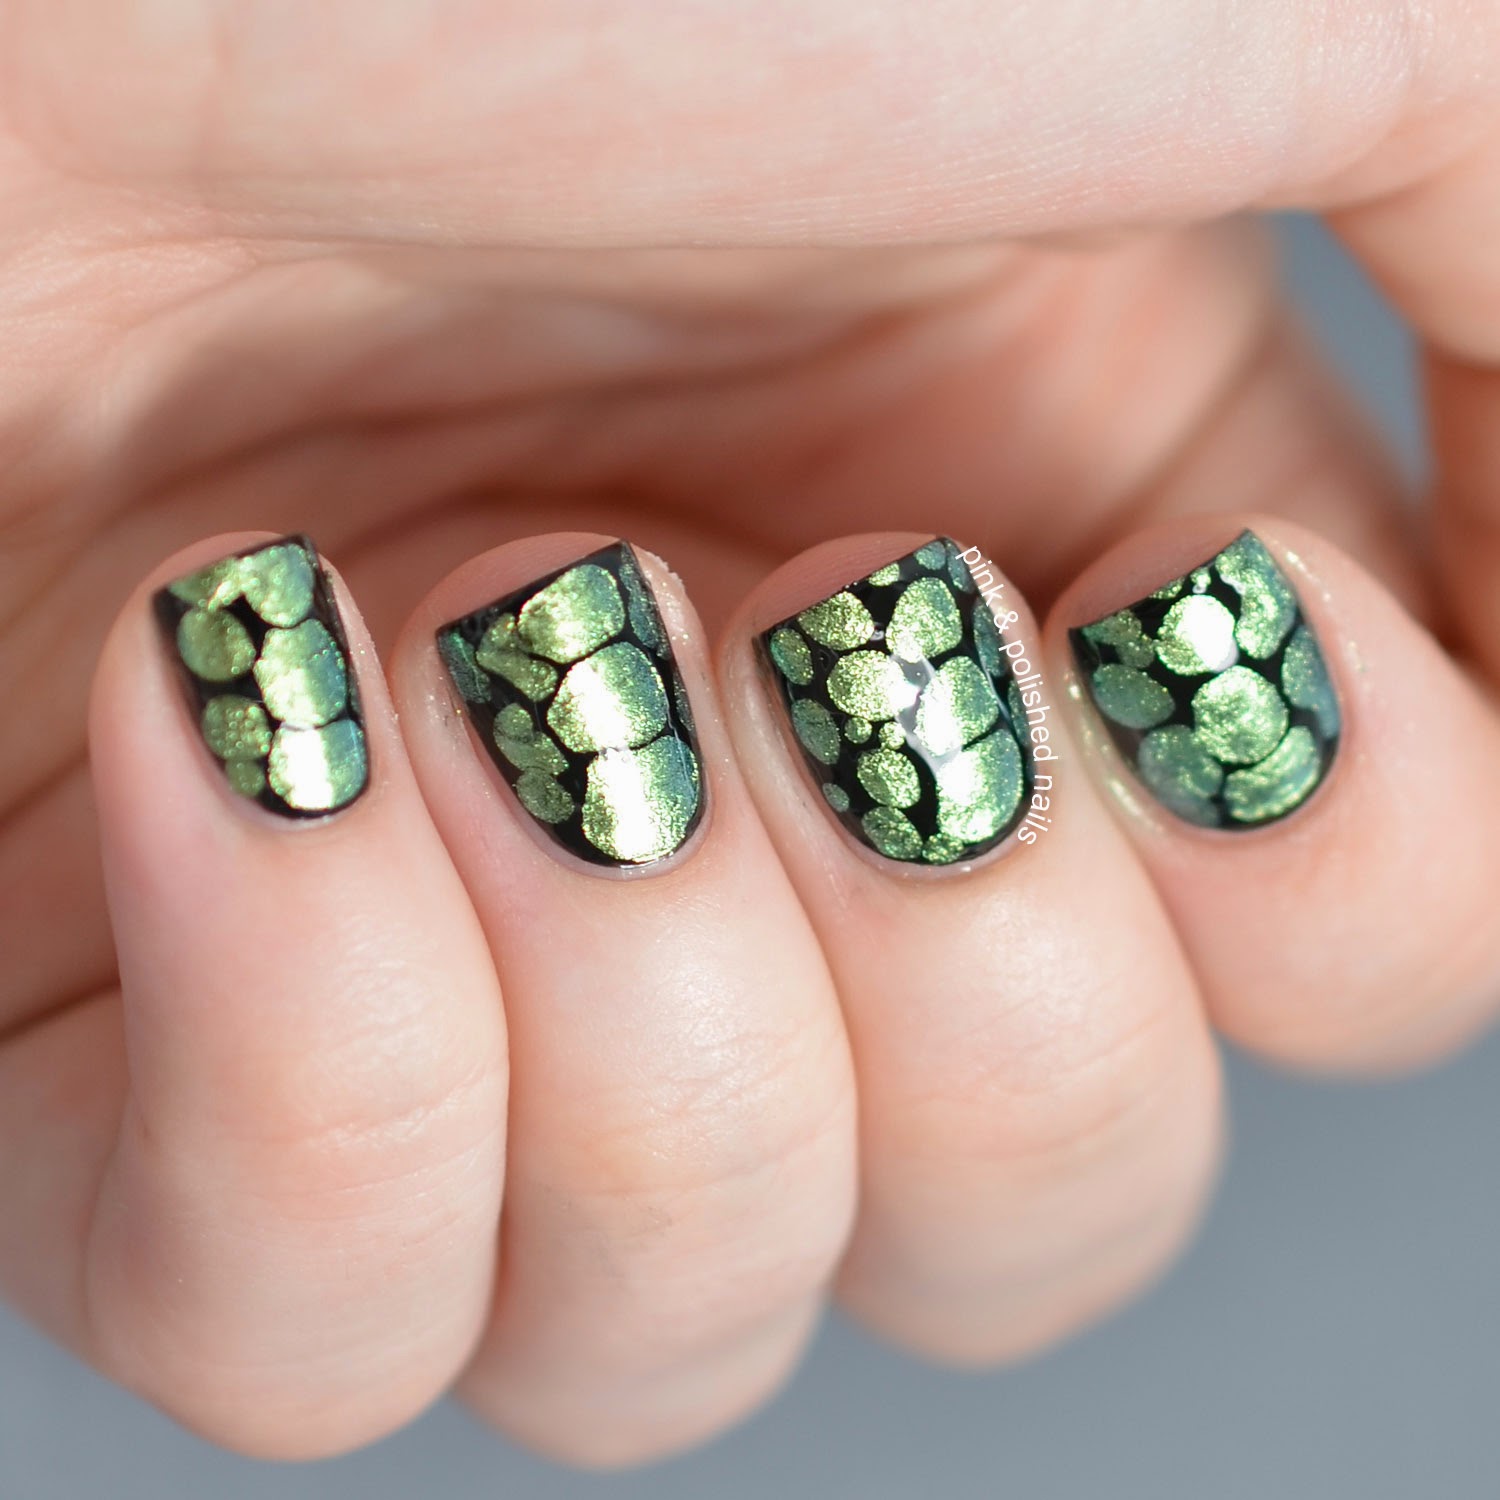
I started with a base of Wet n Wild Black Creme. When it dried I applied Herringbone Stencils from Stick It! Nail Vinyls and sponged China Glaze Unpredictable over top. I removed the stencils while the polish was still wet and sealed it all in with some Seche Vite to finish it off!


I'm serious guys, the pictures don't even do this mani justice! 

What do you think?

Thanks loves :) 

Thursday, November 12, 2015

Houndstooth Vinyls

Hey guys!

I'm super excited to share these nails with you because I am SO happy with them!

I've never created a houndstooth design besides stamping it on my nails, the idea of houndstooth vinyls were so intriguing to me I couldn't wait to give them a shot and MAN do I love them! 

I want to note that these vinyls are brand new from Stick It! Nail Vinyls and not released yet but keep an eye on her Instagram because I think they will be releasing soon! Let's get this look started :) 

I started with a base of Color Club Cosmic Fate and applied the vinyls onto each nail. Then I painted over the vinyls with Mundo De Unas Brown. I peeled off the vinyl and created a triangle shape near my cuticle with China Glaze Mingle With Kringle and outlined it with Wet n Wild Black Creme. I sealed it all in with some Seche Vite and that was it! 


I really am so in love with these! Houndstooth is such a fun design and I wish I used it more often. This look makes me feel so Thanksgiving-ish and SO ready for some turkey! ;)

What do you guys think?

Thanks loves :) 

Tuesday, November 10, 2015

Almost Mono-Marble Nails

Oh hi guys!!!

Sorry I've fallen off since last week, I have some very important family affairs happening at the moment... I can't talk about them yet, but you'll know soon ;) 

Anyways, I thought it was right about time for some more nails art and I decided to tackle the watermarble monster again! Take a look and let me know if you think I succeeded!

I started with a base of Lacquer Lust Unicorn's Brew and applied some liquid latex around my nails while it was drying. I created the marble using Wet n Wild Black Creme and Pipe Dream Polish Clearwater. I finished it off with a layer of Seche Vite and that was it!


I haven't water marbled in a while and I forgot how much I love it.... when it's working well anyways ;) 

What do you guys think?

Thanks loves! :) 

Monday, October 26, 2015

Halloween Mini Dotticure

Hi guys!

More Halloween nails woohoo! I love this look so much because it's not scary, it's not creepy, it's not gory, it's just... cute ;) Sometimes simple nail designs are my absolute favorite designs to do, and this one is classy and still quite festive. Wanna check it out?

I started off by taking a toothpick, dipping it into some Nasty Nails Boink! and adding dots to the bottom portion of my nail focusing heavily on the very bottom edge. When those dots were dry I went back in and added some more dots with Wet N Wild Black Creme. I filled in any bald spots with some more Nasty Nails Boink! and added a layer of TLLB Glow-Stly for some good holo measure ;) Finally I sealed it all in with a layer of Seche Vite and that's it!


I love how simple this look is, and it honestly took me about 15 minutes to create. It's perfect for a last minute halloween manicure, or you can even change it up and use different colors. The possibilities are endless ;) 

What do you guys think?

Thanks loves :) 

Tuesday, September 29, 2015

Always In My Heart

Hi guys,

If you follow me on Instagram (@pinkandpolishednails) then would would have heard already that my beautiful grandmother passed away last Thursday. She fought a short but terrible battle with uterine cancer, and watching her fight and slowly fail was one of the hardest things I've ever had to do. But she is finally at peace and not hurting anymore and that gives me solace.

So, when I went to paint my nails I automatically went for my LynBDesigns Nightmare Revisited. My grandma loved it when I painted her nails and this was the last color I painted on her and she was so in love with it. It seemed only fitting to use it now, especially because it's one of my favorite colors too. I painted two easy coats and applied some Multi Heart Stencils from Stick It! Nail Vinyls over each nail. Then I sponged on some Wet n Wild Black Creme halfway up each nail, removed the vinyl and applied a coat of Seche Vite to seal everything in. 


I love the way this look came out and it makes my heart smile to be reminded of my grandmother. 

What do you guys think?

Thanks loves :) 

Tuesday, July 14, 2015

Mermaids or Dragons?

Mermaid stencils have been super on trend lately in the nail art community and I decided to finally get in to it and man, am I glad I did. 

These vinyls are from Stick It! Nail Vinyls and they are the mermaid stencils, they also carry large mermaid stencils for a larger print. 

I started with a bast of Wet n Wild Black Creme on all of my nails. Then I placed the stencil on my nail and sponged over it using Color Club Over The Moon, Color Club Kismet and a cosmetic sponge. I removed the stencils and sealed it all in with a layer of Seche Vite


Okay these are SO FREAKING COOL! I can't believe I waited so love to try these out! My only problem is I can't decide if they look more like mermaid scales or dragon scales ;) 

Which on do you think they are?

Thanks loves :) 


Sunday, July 12, 2015

Anchors Away!

Okay guys, I've gotta admit... I am OBSESSED with nail vinyls lately! I've been using vinyls from Stick It! Nail Vinyls and they are so easy to use! 

I decided to use the anchor vinyls today and I'm in love! Anchors are one of my absolute favorite symbols and have been for years now. These ones are just TOO CUTE! Wanna see?

I started with a base of Color Club Over The Moon on my middle ring and pinky and a base of Wet n Wild Black Creme on my index. I applied the anchor stencils on my index middle and ring nails and painted over them with Color Club Over the Moon on my index and Wet n Wild Black Creme on my middle and ring. On my pinky I added dots and a tiny bow with a toothpick and Wet n Wild Black Creme. I added the opening back in the anchors with a toothpick and the same colors. Finally I sealed it all in with some Seche Vite!


I may never take these off.... like seriously! I can't believe how incredibly easy these vinyls were to use! My one tip would be to stick them on you skin first because they are quite sticky but that's never a bad thing!

What do you guys think?
Thanks loves :) 

Sunday, June 14, 2015

Cow Patterned Blobbicure

Hi guys!

I've had this idea in my head ever since I started seeing blobbicures pop up in the nail community. I always thought those blobs look an awful lot like cow print and man, I was right! I am in LOVE!

I started with a base of LOOK Nail Color Broad Stripes Bright Stars on my middle and ring nails. Then I applied another thick layer of BSBS and blobbed a few spots of Wet n Wild Black Creme and let them spread out in the polish. On my index and pink nails I started with a base of Wet n Wild Black Creme and painted some small pink hearts with acrylic paints. I sealed all of my nails in with some Seche Vite and that was it!


I am literally obsessed with this! I can't believe how simple this was to create and how striking it is. So fun!

What do you guys think?

Thanks loves :) 

Friday, June 12, 2015

Cool Toned Mosaic

Hi guys! 

I haven't done too many mosaic designs, I don't know, the design itself just doesn't click with me for some reason. But I really wanted to give it another try and while this isn't my favorite design ever I'm still really proud of it! 

I started with a base of NYC Sidewalkers on my ring, China Glaze Too Yacht To Handle on my pinky and a blank slate on my middle and ring. I added two dots of China Glaze Too Yacht To Handle on my index and one dot of NYC Sidewalkers on my pinky. I used some black acrylic paint to paint on the base for my mosaic design on my middle and ring nails. Then I used China Glaze Too Yacht To Handle, NYC Sidewalkers, and Wet n Wild Black Creme. I sealed everything in with some Seche Vite to finish off the design.


I'm really loving this black, gray, and mint color combination, so cool.... literally ;) I'm really happy with how this design came out, I think I'll definitely give mosaic nails a go again. 

What do you guys think?

Thanks loves :) 

Saturday, June 6, 2015

Mani Swap!!

IT'S THE WEEKEND! 

Hallelujah! 

I've got a super fun post to share with you today. I've done my first ever mani swap! Yeah yeah I know I'm behind on the times T.T But for those of you who don't know what a mani swap is, it's when two people on instagram essentially swap mani designs, I recreate one of her's and she recreates one of mine. So fun!

I've swapped manis today with Barbara from @lets_get_polished_my_journey_t and I've recreated her it mani. I absolutely fell in love with it when she posted it and was so super excited to give it a shot myself! 

I started with a base of Azature Light Blue Diamond on my index and ring finger and a base of Essie Boom Boom Room. Then I created the it design on my index and ring using Essie Blanc, Essie Boom Boom Room, and Wet n Wild Black Creme. I added a rhinestone on my middle and pinky nail and seal each nail in with a layer of Seche Vite to finish the design!


I really love how these came out! I haven't done it nails for at least two year I think! I've definitely gotta do some more. What color combinations would you guys like to see?

Don't forget to check out @lets_get_polished_my_journey_t on instagram! She's so super sweet and her nails are beautiful!!

Thanks loves :) 

Friday, May 15, 2015

Simple Cool Dotticure

Ever create a refreshing mani? One that reminds you of splashing in the water on a hot summers day? Yeah.... this is it for me! I love this blue teal purple and black color combination it's so delicious and perfect for the sweet summertime.

I started off with a base of China Glaze Too Yacht To Handle and then created the dots using Wet n Wild Black Creme, China Glaze DJ Blew My Mind, and China Glaze PLUR-ple. I sealed everything in with some Seche Vite and that was it!


You really can never go wrong with a dotticure, there's so many different looks you can create with just one simple tool. It's also a great way to get some creative juice flowing if you've run into a nail art block because it's so easy and mindless and you can create stunning designs!

This look is no exception either, this color combination just screams summertime!

What do you guys think?
Thanks loves :) 

Thursday, April 23, 2015

Reciprocal Star Gradient Nails

Hi guys! 

I'm super excited about these nails because ever since I started seeing these swirl star vinyls I knew I HAD to try them! Well good news and bad news, bad news first: they are a HUGE pain in the butt to apply!! LOL But the good news is that they are absolutely 100% worth it! 

I started off with a base of Wet n Wild Black Creme. Then I created the vertical gradient using Wet n Wild Black Creme and LynBDesigns Nightmare Revisited. When that dried I applied my star vinyls (which I purchased from Snail Vinyls) and created the same gradient but with reverse colors. I peeled off the vinyls and added a layer of Sech Vite to seal everything in. 


I'm so obsessed with reciprocal gradient designs lately. The final effect is just so amazing to me LOL! But really, these nails totally made me feel like a rockSTAR B)

What do you guys think?

Thanks loves :)

Thursday, April 9, 2015

The Blobbicure

Hi guys!

Blobbicures have been getting crazy popular lately so I thought it was about time for me to try my hand at it ;) If you don't know what a blobbicure is, it's basically a "blob"-esque design that is created when you use a thick layer of base polish and start adding blobs of a second polish on top while your base is still wet. The blobs spread out on your nails and give you some crazy cool designs. You can see what I mean below ;)

I started off with a base of Wet n Wild Black Creme. Then I blobbed on some China Glaze Unpredictable while my base was still wet. I sealed everything in with some Seche Vite and that was it! So simple right?


I really love how easy blobbicures are to create and the final product is just too freaking cool. I have SO many different color combinations in my head I can't way to revisit this technique so be on the look out ;)

Also keep an eye on my Instagram and YouTube Channel for tutorials on this look!

Thanks loves :) 

Friday, April 3, 2015

Black and Neon Abstract Square Nails

More abstract nails!!!

I also got the inspiration for the square design off of a pattern on Pinterest. Pinterest is such an awesome place to go if you're lacking nail inspiration, there are so many different and fun patterns on there it will destroy that road block and get you excited to do some nail art within 5 minutes I swear! 

I've been wanting to do this design for a while and I' so happy with the way that it came out! Tell me what you guys think!

I started off with a base of Wet n Wild Black Creme on my index and middle nails and China Glaze Pool Party (new version) on my ring and pinky nails. I created the square design with white acrylic paint and a thin, long bristled nail art brush. While those were drying I applied two layers of TLLB Glow-Stly on my ring and pinky nails and then two dots near my cuticle with Wet n Wild Black Creme. Finally I sealed all of my nails in with some Sech Vite and to add a little bit extra something I added a layer of NYC Matte Me Crazy on just my index and middle nails. And that was it!


I love the contrast between the flat and dark square nails against the bright, holographic, and shiny neon nails. I feel like it gives so much visual interest and I honestly didn't want to take this design off like.... ever. LOL

What do you guys think?

Keep an eye out on my Instagram and YouTube Channel for tutorials on this look!

Thanks loves :) 


Wednesday, April 1, 2015

Minty Gold Leopard Nails

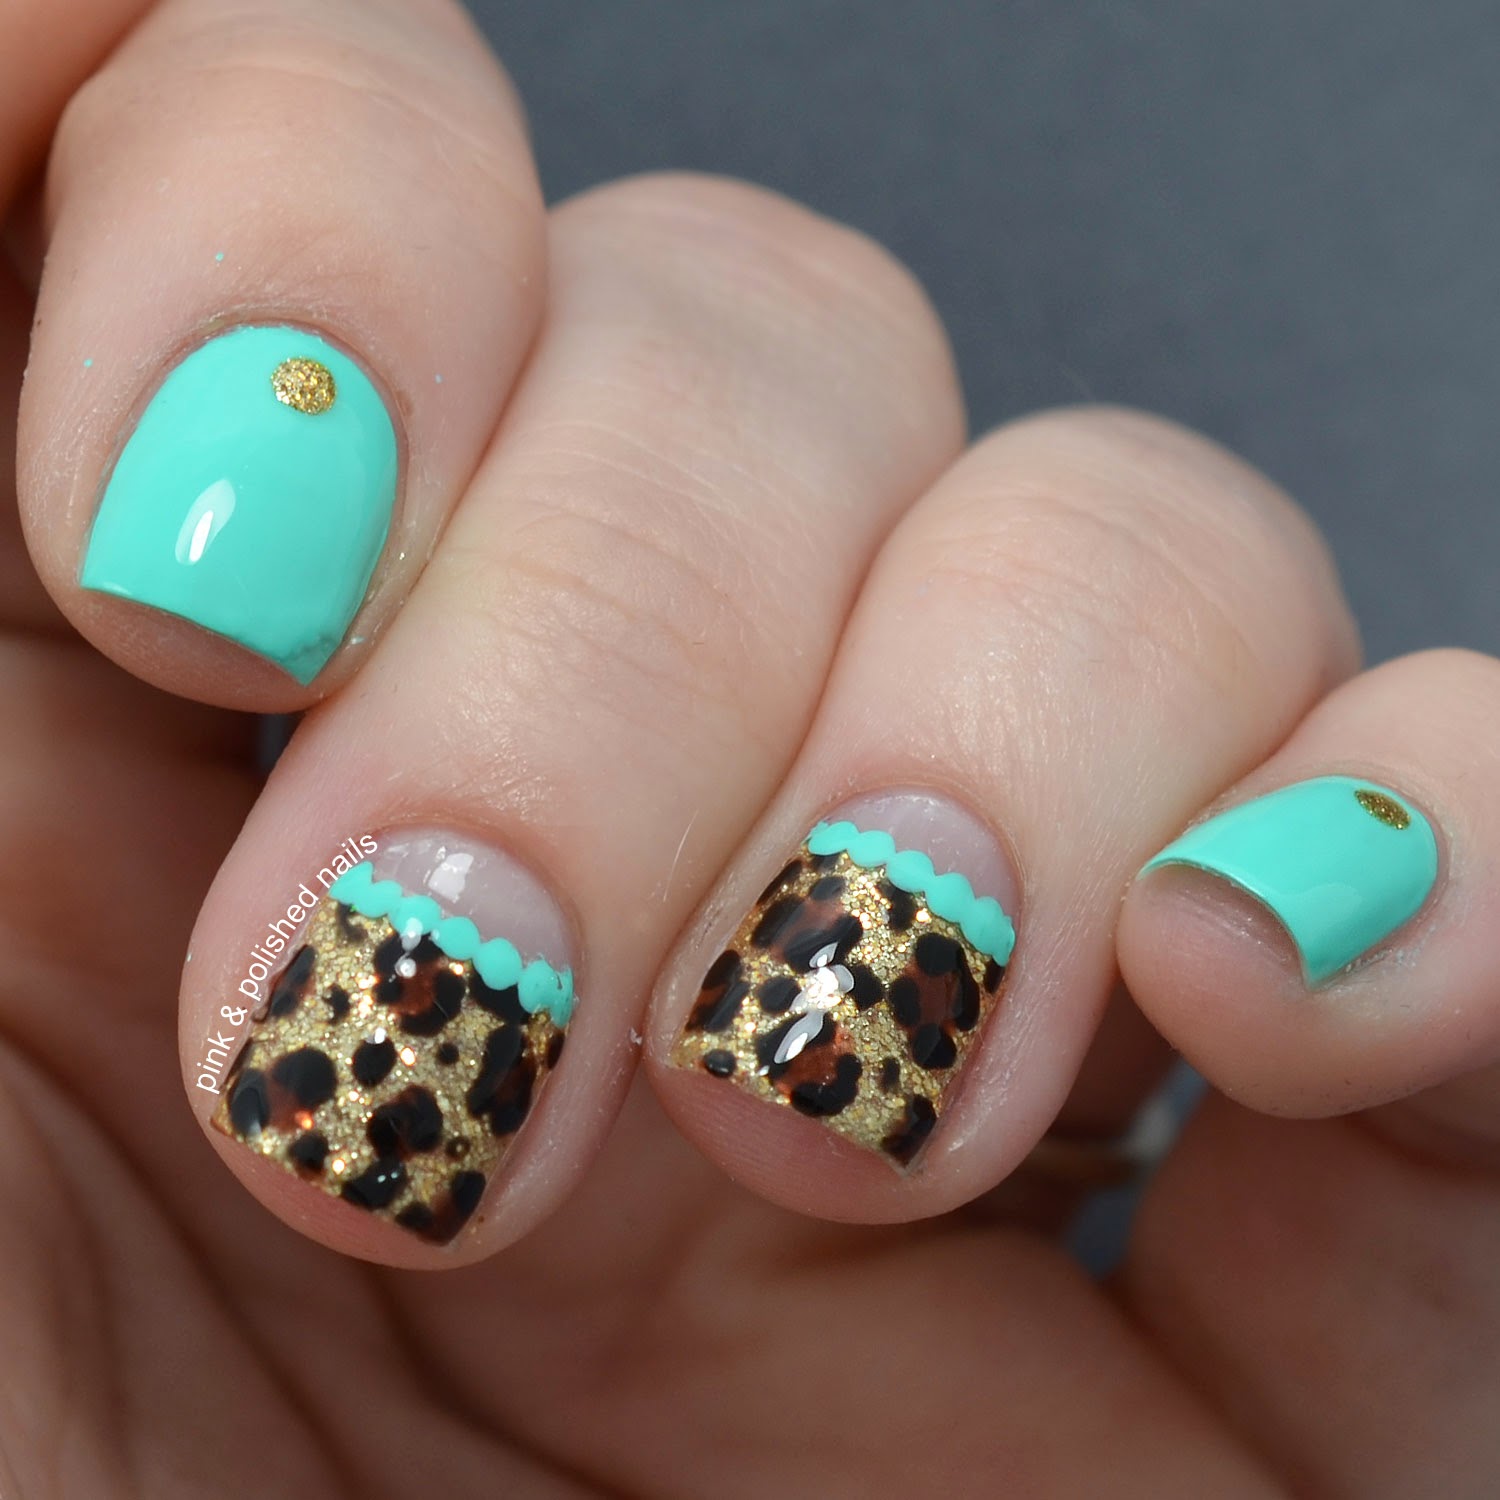
Mmmm there's nothing like a good mint polish to really get you excited about doing some nail art. LOL but really mint is such a flattering polish color and I've just been obsessed with it lately so of course I had to incorporate it in some animal print nails!

I started with a base of China Glaze Too Yacht To Handle on my index and pinky nails. On my middle and ring I used Sally Hansen Real Nail Polish Strips in the gold french tip design and placed them high to create a half moon. Then I sealed them in with the clear strips that came with the package to make sure they adhere to my nails nicely. Next I created the leopard print using TLLB Spiked Hot Chocolate and Wet n Wild Black Creme. I added a dotted outline to the half moons using China Glaze Too Yacht To Handle and added a dot of China Glaze Mingle With Kringle on my index and pinky nails. Finally I sealed everything in with a layer of Seche Vite and that was it.


I really feel like the mint compliments this gold so well. It adds the perfect amount of brightness and gives it such a sweet finish. 

What do you guys think?

Thanks loves :)