Showing posts with label stripes. Show all posts

Friday, September 12, 2014

31DC2014 Day 12: Stripes

Ugh fall, I really wish I didn't hate you! But with your cold weather and germy colds how could I not? Of course the universe would decide that now is the perfect time to get a cold, with the opening of my shop, working two jobs, and trying to complete this challenge -_- Why universe WHY?! 

I really am the most miserable person in the world when I have a cold... so expect to hear some complaining while it sticks around ;) But I'm still going to try my absolute hardest to finish this challenge cold or not! 

So let's get on to the nails shall we? Day 12 of the 31 Day Challenge 2014 is stripes and I thought this would be the perfect time to debut my The Little LacquerBean mini straights nail vinyls! (I'm also having a 30% off sale on everything in my store! Use code open30 at checkout) So check out the look I created :) 

I started off with a base of Wet n Wild Black Creme. When it dried I placed my nail vinyls on my nails, painted over them with Color Club Beyond, and peeled them off to reveal some funky striped nails! I sealed it all in with some Essie Good To Go


So sparkly! *.* LOL I love how subtle this look can be but the second the sunlight hits it BAM! holo ;) 

I thought about spicing these up even more with some more stripes in other holographic colors but I'm just too tired to get it done :( I'll have to put it in my idea book for a later time! 

You guys ready to show me what you got?! Post a link to your 31DC2014 Day 12: stripes in the comments so I can see!! 

Thanks loves :) 

Saturday, January 11, 2014

Inspiration Nation: Freckled Finger Nails

Been a long time since you've seen one of these posts hasn't it? 

When I saw THIS design by Freckled_Finger_Nails on Instagram I instantly fell in love. This design has been on my mind for quite a while now and I'm so glad that I've finally been able to try it out. I'm not going to lie, it wasn't easy. I tried for hours trying to get the right technique for the water colored roses and I can't tell you how many times I failed. I finally googled some water colored nails and found the right technique! 

All you have to do is mix acrylic paint and water to make the water color mixture. Then you take your brush and draw a bumpy circle. Once the pain starts to dry I sucked up the wet part with a q-tip. Then I just kept adding circles smaller and smaller until I felt they looked rosy! 

So, I started with a base of Lime Crime Milky Ways. For my index and pinky I taped off the stripes and sponged on Color Club Miss Bliss to give it a vintage sort of look. Then I created the roses using the technique above and red and green acrylic paints. I topped everything off with some Poshe to give it a great shine.


I am so in love with these nails! I think I wore them for 4 days which is almost unheard of for me ;) Thanks so much Freckled_Finger_Nails for creating such beautiful and inspirational nail art! 

Thanks loves :) 

Tuesday, December 24, 2013

Christmas Eve-icure

What the heck?

How did Christmas sneak up on me so quickly!?!? There are so many Christmas nail designs to be done that will never get done!! T.T I really don't even understand! *sigh* Christmas slow down please! 

At least I have a design for Christmas Eve Day right?! 

I started this look with a bast of Azature White on all or my nails. On the striped nails I used striping tape with China Glaze Santa Red My List, China Glaze Con-Fused?, and China Glaze Angel Wings. For my thumb and ring finger I did a glitter gradient using China Glaze Angel Wings and then applied a red and green rhinestone to the top. I topped is all off with some Poshe and the design was finished! 


Totally digging this look! I'm so sad I have to take it off but sadly I haven't even thought about what my Christmas nails are going to be so I must find time today to figure them out! Suggestions welcome!!! :) 

I hope you are all having a wonderful Christmas season and hopefully you're more prepared then I am!! ;) 

Friday, December 20, 2013

Oh dotted tree, Oh dotted tree!!

Rolling along on the Christmas posting train choo, choo!! ;)

My creative juices just may be returning to me, I'm feeling more inspired and I think my designs are starting to reflect that again. *Sigh* it feels good to be getting back into the swing of things! 

Anyways I've been wanting to do a dotted Christmas tree design for a while and I'm super happy I decided to finally give it a go!

I started with a base of Azature White on all of my nails. For my thumb and ring I did the trees using China Glaze Con-Fused?, Blackheart Beauty Jealous Type, China Glaze Def Defying, and Maybelline Color Show Candy Apple. I topped the trees with some yellow acrylic paint. For my remaining fingers I used a striping brush and the same colors and painted some random stripes. I topped everything off with some Poshe and the deign was finished! 


Look at that pudgy little Christmas tree! Awwwww

I wish I had my Christmas tree decorated when I did these nails I would have loved to have a photo with it! Maybe next time I suppose. I hope my creative mojo stays with me for a while but we'll see. ;) 

Thanks for reading cupcakes!

Wednesday, August 7, 2013

Mish Mash Challenge: Taping

Hi chickies!

It's time for another challenge day in the Mish Mash Challenge hosted by Kimbers Lacquer Korner! Today's theme is taping. I have a very love hate relationship with taping, striping tape to be more specific... I absolutely love the effect it can give but really hate cutting all those stupid little pieces! They always find a way to get stuck all over me -_- But I wanted to do something really cool for this challenge so I sucked it up and cut 2673857489 little pieces of tape.

I'm not sure where this design idea came from, it actually wasn't my first idea but I couldn't quite get that one to work out without swearing profusely! So I just kind of stuck some tape on my nails until I had something I remotely liked ;) 

To start this design I painted all of my nails with two coats of OPI My Boyfriend Scales Walls and then two coats of China Glaze Orange Knockout on top of that. Once my nails were dry (I used some Poshe top coat to speed up drying time ;) ) I put the vertical pieces of tape on my nails. I put one piece horizontally to make the cut off line nice and clean. I painted over the tape with Lime Crime Peaches <3 Cream and pulled the tape off. When that was dry I put the horizontal pieces of tape on and painted over those pieces with the same polish. After I pulled the tape off I did some touch ups with a striping brush, top coated everything with Poshe and I was done! 


I really quite like how the final result looks! It was a little time consuming but I definitely think it was worth it. What do you guys think? Do you use striping tape? Is there an easier way to cut all those pieces because I don't think I can handle the nightmares!! ;) 

Thanks guys and don't forget to check out everyone else's taping nails! I can't wait to see what everyone comes up with :) 


Tuesday, July 30, 2013

Big scary: Freehand stripes

Hey chickies!

Recently I was searching for a new nail art brush since none of mine seem to be quite small enough. I ended up stumbling upon stylishnailart on instagram and found that she sells like a million tiny brushes. So I perused her brushes and settled on one and ordered it! To my surprise it came in really quickly and I got to play around with it the other day. I was feeling pretty brave and with my new nail art brush in hand so I decided to tackle one of my big scarys: free hand stripes. I've always admired those talented bloggers who are so good at making free hand stripes... it seemed like whenever I tried they went anywhere but straight.   -_-

But! Since my skills have improved and I got the right equipment I was actually successful this time! They aren't perfect but they are definitely a huge step in the right direction! 

I started with a base of Lime Crime Parfait Day. Then I took my nail art brush and created an off-centered stripe with China Glaze Pool Party and outlined it on either side with OPI My Boyfriend Scales Walls. I finished it off with a generous coat of Poshe top coat.


I wish I could have worn these for longer, they're real simple but they really stood out! I think that partially because Pool Party is just so darn bright!!

What do you think? Do you do free hand stripes? Have any tips for me? :)

Oh! And I also got myself a brand new light box with brand new lights can you tell the difference in my pictures?? 

Thanks guys!

Monday, February 11, 2013

Blazing stripes

Good morning!

Well it's back to normal today... wishing I could have just one more snow day just to get past Monday ;) 

But enough whining and on to the nails! I had no idea what I was going to do on my nails the night I did these all I knew is I definitely wanted to use Zoya Blaze. I've been neglecting my three Zoya's from the Ornate Collection and I have no idea why! These polishes are some serious gorgeous-ness! Anyways, I'm not sure I really love the end result but we win some we lose some right? Oh and I know the lines are crooked on my middle nail -_- haha!


Color used:
- Zoya Blaze
- Lime Crime Milky Ways
- Sally Hansen White On


I think what I don't like about it is Milky Ways is far too light! And The stripes don't really let the beauty of Blaze shine through...

But it's on my nails so that means it gets a spot on this blog! Lol!

So what do you guys think?

Thanks for reading :)

Sunday, January 27, 2013

Totally tape-ular dude!

Happy Sunday!

I hope your weekend is going well! I was SO unproductive yesterday -_- I was planning on painting my nails at least twice maybe three times and only ended up painting them once... but it's ok because I am totally loving them! LOL I decided to break out the trusty striping tape and just do something random, too bad I can't actually do anything random because I am WAY too OCD -_- hah! I still think they came out pretty BA though so check them out! 


Colors used:
- Lime Crime Once in A Blue Mousse
- FInger Paints Late Night Rendezvous


I did a different design on my right hand since I knew I wouldn't be able to do the one above on it. I mean I probably could but it took me almost an hour and a half just to lay the striping tape down on my left hand and I really didn't feel like doing that again -_- But it's actually quite cool so here's a close up of my right ring finger :) 


Simpler but they kind of look cool together. I should have taken a photo with both my hands... oops! I really love using striping tape! Well, I hate cutting it and placing it and finding that stupid end piece, but other then that it's awesome ;) 

So what do you guys think?

Thanks for reading and don't forget about my giveaways! :)
Click HERE for my 300 Follower one
Click HERE for the multi-blogger Valentine's Day one

Friday, December 7, 2012

12 DoC: Candy Cane

Good morning!

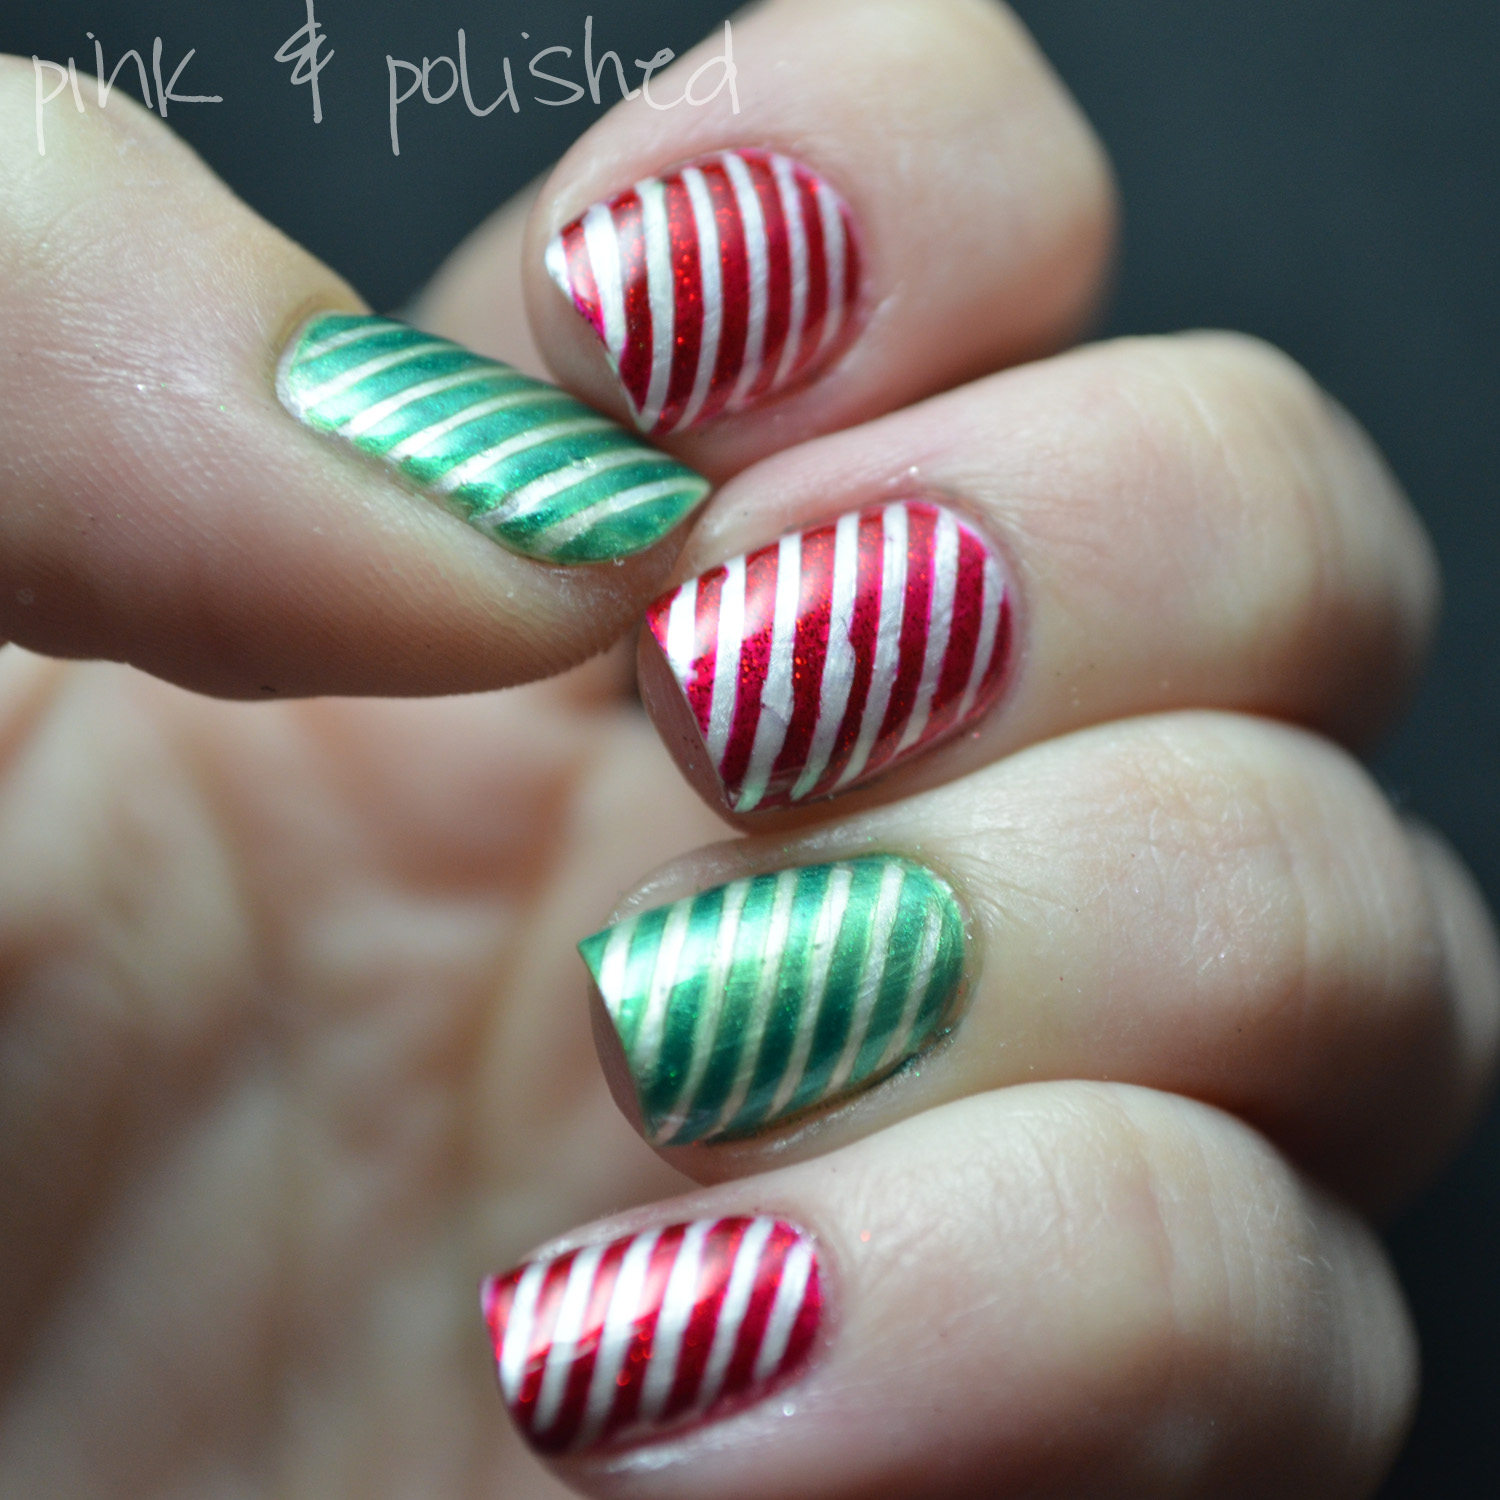
TGIF right?! Lol! I am SO excited that it's Friday! Even though I have to work on Saturday -_- Oh well! Today calls for another installment of the 12 Days of Christmas Nail Art Challenge that Lorene over at Over Polished Nails and myself have created! The challenge for today is candy canes! I don't know if you all remember but not too long ago I did a candy cane mani which you can see HERE. I loved that one so much but I knew I had to do something different for this one :) So I pulled out the trusty striping tape and went to work! This is what I came up with!


Colors used:
- China Glaze Ruby Pumps
- Sinful Colors San Francisco 
- Finger Paints Well Cultured Pearl


So sad my middle finger got kind of messed up :( *sigh* LOL I know green isn't really "normal" candy cane colors but I really LOVE this combination! 

What do you guys think?

Make sure you check out everyone else's candy canes today!

Thanks for reading :) 


Saturday, October 27, 2012

I feel growed up!

Good morning guys!

Today I have what I feel is a grown up mani ;) A couple of days ago when I did this mani I decided to take a little time and just pamper my nails because I've been painting them so often. My nails were pretty gross O.O they were all stained and uneven and my cuticles were a MESS! So I moisturized and filed and buffed and well, you all know the rest. After I was done they looked like a million bucks :) So I decided not to just paint over them again and instead did a simple white french tip. Unfortunately you know I couldn't just stop there ;) So on my ring finger I did some stripes and rhinestones! But overall I think the look is simple and beautiful! Take a look :)


Colors used:
- Finger Paints Paper Mache
- Kiss Black Striping Polish
- Kiss Silver Striping Polish


So what do you guys think? I have to say I felt so pretty after these were done!

Thanks for reading! :)