Showing posts with label inspiration nation. Show all posts

Tuesday, March 10, 2015

Twinsie Tuesday: Soft and Feminine

I'm late for Twinsie Tuesday AGAIN T.T

This time it's not entirely my fault I swear! I've been sick this weekend and I was going to write up my post yesterday but my computer decided that it didn't want to work. I was trying to download the new version of iMovie and it just completely shut down my computer. Technology right?? But it's all settled now so I'm finally writing up my Twinsie Tuesday post woohoo!

The theme for today is soft and feminine. I'm super excited about this post too because I really wanted to try out this one stroke ribbon method I saw Madamluck do on Instagram. Man, it's way harder then I thought it would be to do! But I figured it out and I can't wait for you guys to see what I've come up with!

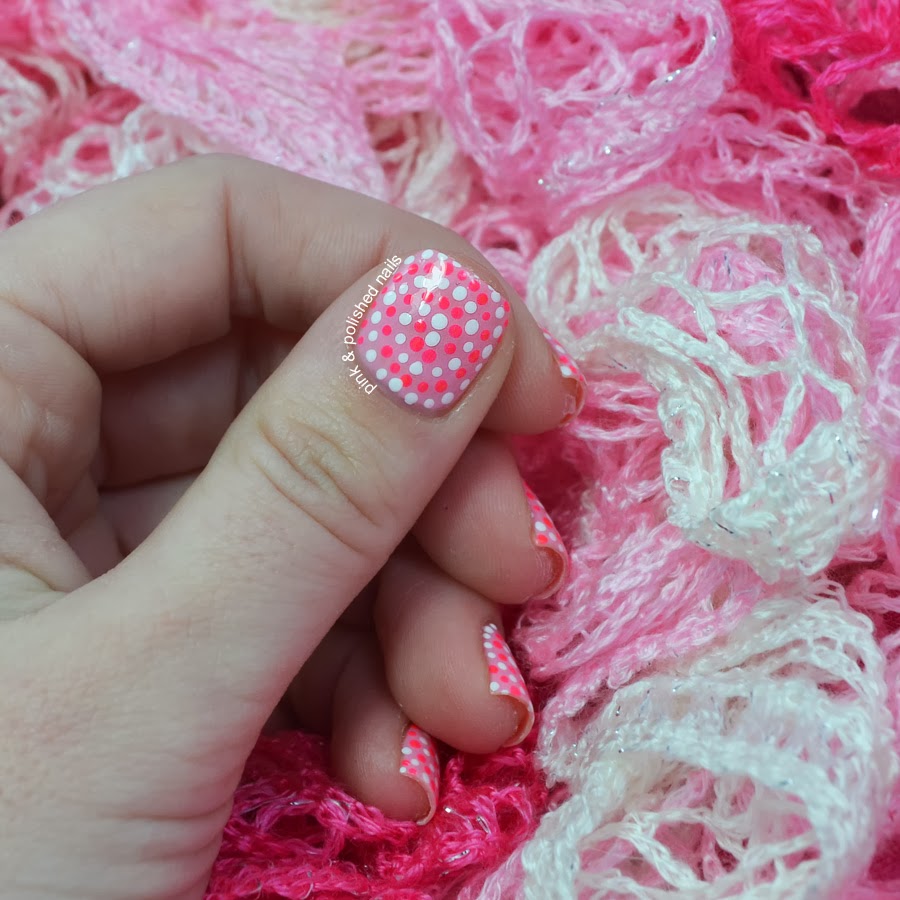
I started out with a base of Sinful Colors Snow Me White. Then I created the ribbons using a pink and lighter pink acrylic paint. I outlined the edge with a slightly lighter pink acrylic paint and created the dots using two different teal acrylic paints. Finally I sealed everything in with a coat of Seche Vite and that was it!


So they OBVIOUSLY didn't come out as good as Madamluck's did (she's a goddess!!) But I'm quite proud of these ribbon nails and really want to revisit this technique again soon.

What do you guys think? What color combination would you like to see?

Don't forget to check out everyone else's Soft and Feminine nails, I can't wait to see what they've all come up with!


Róisín at Cuti-CLUE-les
Marisa at Polish Obsession
Lakeisha at Refined and Polished
Jessica at Blue Velvet Lacquer
Chelsea at Nailed Blog
Bridget at A Painted Nail
Amber at Nails Like Lace
Amanda at Fashion Footing
Amanda at Amandalandish
Alaina at The Little Canvas

Thanks loves :) 

Tuesday, October 28, 2014

Inspiration Nation: Halloween Edition

Hey guys!

I did that whole disappearing thing again didn't I? Poop. Sorry guys! I've been juggling so many things lately that blogging has kind of taken a back seat. I'm working hard on my line, The Little LacquerBean and there's some exciting things that are going to be happening with it so keep an eye out! 

Anyways let's get on to the nails! I'm sure most of you know Kelli from The Nail Polish Challenge, and if you don't you have to immediately click that link to see because she's amazing!! These nails are inspired by a manicure that she did recently, a mattified dotticure. I seriously fell in love with the nails she did and I loved her color combination, I really wanted to recreate them using the same colors but since it's almost Halloween I thought that a themed manicure would be fun! 

Okay so you're totally going to be mad at me but I literally cannot remember what I used for a base... I really want to say Lime Crime Milky Ways but I just don't know! The lighting is a little off so I'm not sure if it's actually white. Hmmmm, well it will work with either color ;) Then I used Wet n Wild Black Creme, Lime Crime Pastelchio, and Sinful Colors Citrine along with a large dotting tool to create the dots. I applied Essie Good To Go before my matte top coat to prevent it from smearing my dots. And when it dried I used NYC Matte Me Crazy to finish it off!


What do you think guys? I know it's not even close to the amazingness of Kelli's but I'm seriously digging this mattified mani!

What's your favorite design to mattify?

Thanks loves :) 

Saturday, March 22, 2014

Inspiration Nation: FILTH Designs

So I was on the hunt for some nail inspiration the other day and I was looking for a challenge. I was searching the internet when I decided to take a trip over to my friend's Facebook page. My friend Nick is an extremely talented artist and he has a Facebook page solely for his designs, I highly recommend you check it out ;) Anyways I stumbled upon THIS design that he did a little while back and knew I had to take some inspiration from it, there's actually a few things I want to do with the design so keep your eyes peeled for some more posts!

I started with a base of Essie Blanc on all of my nails. I painted on all of the black designs with black acrylic paint and let them dry. When they were dry I added a layer of HITS Hefesto, because boys never make anything sparkle! It's a crime really ;) I finished the design off with some Poshe top coat. 


With flash :) 
Ahhhh these were so much fun to create!! I mean they took a little while (3 hours -_-) but it was definitely worth it to see the look on Nick's face when I showed him LOL 

What do you think? Have you ever been inspired to do nail art off a design like this? 
Thanks loves :) 

Wednesday, February 12, 2014

A Valentine's Day Inspiration Nation

Love is in the air! 

Well it always is isn't it? I suppose I'm just looking for an excuse to use pink nail polish, but then again, I don't need one of those either... this blog IS called Pink & Polished riiiiight?! ;)

Details, details...

Anyways! I think it's about time for another inspiration nation post, I've been inspired by the extremely talented Lucy from Lucy's Stash time and time again and when she posted her Valentine's Day Dotted Swirl Nails I knew I had to give it a whirl! She even posted a tutorial video with some really helpful hints like how to get perfect swirls... I really recommend you watch it, it's so helpful! 

So I started this look off with a base of OPI Chic From Ears To Tail on all of my nails. When that was dry I created the dotted swirls using Essie Blanc, China Glaze Pool Party, and a dotting tool. I sealed it all in with some Poshe top coat and fell in love! 


Okay so, I absolutely love this design BUT these pinks do something to my camera that she just can't handle! I don't know if it's the neon-ness of CG Pool Party or just the fact that this light pink doesn't work with my skin tone... either way it looks like I did some nail art on a dead hand so I'm sorry for that ;( LOL But you'll just have to believe me it looks so pretty in person! Damn you camera devil!! 

Valentine's Day is right around the corner! What are YOU going to wear on your nails?
Thanks chickies :) 

Tuesday, January 14, 2014

Inspiration Nation: Work / Play / Polish

I'm sure the wonderful Work / Play / Polish needs absolutely no introduction to the nail community. Leslie is so wonderful and incredibly talented I'm surprised I haven't done an inspiration nation post inspired by her yet. 

Well no more! 

A while back leslie posted THESE nails using OPI's Minnie Mouse collection. I fell in love with her textured rose nail and knew I needed to try it out. I'm not so sure if it works for an entire nail design though... but hey I had to give it a shot ;) 

I started off with a base of Wet n Wild Black Creme and topped it with some Poshe so that it was super shiny. Then I created the roses using OPI Magazine Cover Mouse and a small nail art brush. No top coat for this one as I wanted to keep the textured look! 


I really love this design, but I think next time I'd use it as an accent like Leslie did. I'm glad this textured trend is still going strong and I'm hoping it continues that way!

What's your favorite textured polish?

Thanks cupcakes! :) 

Friday, November 22, 2013

Supah Supah Late Mish Mash Challenge: Grey

fjlcsbjklvdajvdfjnkvalkjlnrkl!!!!!!!!!!!

HELLO!

Ack I'm so sorry guys! I told you I wouldn't run away and then what did I do? Got up and ran away -_- I truly am sorry that I haven't posted guys, this past week that I've been gone I was struggling with some personal issues, nothing bad, just basically life decided to pile up and slap me in the face. I just had to take a step back, do some deep breathing, and put me first again [and a good cry session never hurt anyone ;)]. I hated being away from the blog because you guys don't know how important this blog is to me. All of you lovely readers, whether you comment or not, are the reason I do this. You all are what keep me going and it makes me sad when I can't be here. But not to worry I'm back and better then ever! Enough with the mushy stuff now it's time for some super late mish mash nails!!!

I've literally been trying to get these up since Wednesday but I haven't had a moment to spare! The theme for this week was gray and I knew exactly what I wanted to do. Among all of the very talented nail artists on instagram THIS manicue from @kgrdnr has made me drool ever since I saw it. I really wanted to do it in pink but alas, grey is the theme so it will have to do ;) I'm really happy with the way these turned out so make sure you take a look :) 

I started with a base of Azature White and then sponged on the gradient using the same and ELF Misty Haze. Then I used gray acrylic paint to paint on the design. For my accent nail I used OPI This Gown Needs A Crown and placed a pearl at the base. 


I've got to say I love this! It doesn't do justice to @kgrdnr's original design but I'm definitely still happy with it. 

So thanks again for sticking with me everyone!! Muah!!! <3 


Wednesday, November 6, 2013

Mish Mash Challenge: Holographic

Hello lovlies!!

Happy hump day says every camel ever! ;) It's time for another mish mash challenge day and I was super excited about the theme: holographic. It's no secret that holographic polishes are some of my favorite! I desperately wanted to bring you guys a holographic watermarble but Miss Watermarble being the fickle bitch that she is said "ain't no way in hell you're getting a holographic marble today". UGH! I literally tried for 3 hours yesterday and got a big fat NOTHING! Damn you Miss Watermarble!!! So sad :( 

But I decided to try out a maze gradient nail again inspired by the lovely Sarah from Chalkboard Nails. She always has such amazing nails and she does these gradients and paints a maze design over them that I just drool over every time. I decided to give is a go and loved it! It was surprisingly much easier then I anticipated! 

I started with a base of Color Club Over the Moon and sponged a gradient over that using Color Club Over the Moon and Eternal Beauty. When that was dry I took Color Club Beyond and a nail art brush and painted the maze design on top. Top coat with some Poshe and it was finished! 

OH! And watch out guys I'm experimenting with my photos AGAIN! -_- I just can't settle LOL! I'm loving this crisp white background though... but the edges came out far too blurry :( What do you guys think about it? 


Too bad the holographic effect didn't shine as bring in the photos as it did in real life :( But you can see a little sparkle below.


Well, these weren't exactly what I expected, again thank you Miss Watermarble -_-, but I really do love this design! And come on... everything is better with some holographic-ness mixed in! ;) 

What do you think? What's your favorite brand for holographic polishes?
Thanks dolls! Don't forget to check out everyone else's holographic nails! 


Wednesday, September 18, 2013

Mish Mash Challenge: Cold + HAPPY BIRTHDAY TO MY BLOG!!

Hello lovlies!

How's everyone's week going? Mine started out pretty crappy, I was super sick at the start but thankfully I'm feeling better now. Anyways since today's Wednesday it's time for another Mish Mash Challenge! Today's post is kind of a combination post, a challenge day and an inspiration nation day. :)

Also, If you read the title you already know.... It's my blog's birthday!! Woohoo!! One whole year ago I tentatively posted my very first post to empty air. I was afraid of criticism but my love for polish couldn't be stopped! ;) Starting this blog was the very best decision I have ever made and I'm so proud to be a part of this amazing nail community. I can't believe I've made it this far and I can't wait to see how far I can go! 

That being said, I want to thank you guys for making this blog what it is, I am going to be posting a giveaway on here soon to show you guys how much I appreciate you! But, I want to know if any of you bloggers out there want to join up with me to make this a collaborative giveaway!! 
If you want to join in send me an email at kjones622@hotmail.com 

You guys are the best!!! :) 

Anyways, the theme for the challenge is cold. Now when I think cold I always think of rain... yes I know rain isn't always cold BUT it's what comes to my mind so deal with it!! ;) Since I thought of rain my mind immediately went to a tutorial that I've recently seen from the lovely and super talented Lucy of Lucy's Stash! She did a tutorial a short while ago of water drop nails. I fell in love with them as soon as I saw them and I'm so excited I finally got the chance to try them out! 

To start off this design I started with a base of Color Club Over the Moon. I feel like I use Color Club holos in every manicure I do.... that's ok though because they're gorgeous!! Then I used Navy Blue and White acrylic paints and followed Lucy's tutorial to create the water drops. I top coated with Poshe and was all finished! 


I am SUPER proud of how these came out!. Lucy made her tutorial so easy to follow and these nails took me less then and hour and a half! I was amazed LOL! So hopefully rain drops don't count as cheating.

So what do you think guys? Make sure you check out everyone else's cold designs today!
Thanks loves! :) 


Sunday, August 25, 2013

Inspiration Nation: Glitter Tips

Hey chickies!

Ready for another Inspiration Nation post? My inspiration this time comes from another blogger that I follow like... religiously lol! She's super sweet and her nails are always flawless! Not to mention she's so talented!! I'm talking about the lovely Marta from Chit Chat nails :) Marta is pretty well known for her skittlette manis but she does something else that I really love.. faded glitter tips! She's done a bunch of them and every time I see one I drool all over my keyboard! She's actally written up a tutorial for how she does them too. 

To start this mani I did two coats of an unnamed sheer pink polish... It was just one of those weird ones I got in a package at some store. But it works great to make my nails look unstained so I'll take it! ;) Then I took a make up sponge and ripped it in half so I had a little bit of a jagged edge. I do this so the color gradient part isn't such a straight, cut off line. Then I did the gradient tip with Zoya Zuza, a beautiful shimmery teal. When that was dry it took Orly Mermaid Tale and placed the glitter from the tip of my nail all the way to the middle. Finish off with some top coat and you're good to go!


Not only is the final result super pretty but it's actually really easy and not time consuming. Tips like these will definitely be making a repeat appearance on Pink & Polished so I hope you like them! ;) 

Thanks loves!

Friday, August 9, 2013

Inspiration Nation: One Stroke Flowers

Hi cupcakes!

I think it's time for another Inspiration Nation post! My inspiration this time comes from a blogger that I have always idolized! She does amazing nail art and her nails are just freaking gorgeous!! That's right I'm talking about the awesome Lucy from Lucy's Stash :) One of the many amazing things that Lucy does is one stroke flowers. I've always wanted to do one stroke flowers... actually I tried them once wayyyyy back in January and it wasn't a complete fail, not nearly as good as hers but I knew I'd want to revisit them some day. Lucy actually wrote up a tutorial post for one of her one stroke flowers so I figured that would be a great place to start ;) 

I started with a base of Zoya Aurora. Gosh I love this color! Zoya really hit the nail on the head with their 2012 Christmas collection! After that was dry I followed Lucy's tutorial and took white and purple acrylic paint and painted on the flowers. Then I took black acrylic paint and outlined them. After some top coat I was done and super proud! 


They aren't perfect but I think they are so much better then my last attempt. Practice makes perfect that's what they say right? Not to mention Lucy's tutorial made it so much easier too!

What do you think? Watch out for more one stroke flowers on the blog because I'm totally hooked!! 

Wednesday, July 24, 2013

Inspiration Nation: Purple Waterfall

Hi cupcakes :) 

I've got another Inspiration Nation post for you all today. I really really enjoy looking at all of the beautiful and creative nail art that's circling the interwebz. Everyone has their own style and own amazing ideas. The best part of not know what to do on my nails is having the advantage of looking around... I mean seriously all you have to do is type in nails to google and you get 73895794379 million results. It's amazing! 

I've got a bunch of blogs that I follow.. and I always love finding new ones so if you've got a blog you want me to know about here's your chance! Let me know in the comments what it is and I'll be sure to head right over :) 

Anyways, one of the very first blogs I ever followed was Sammy at The Nailasaurus. She is one of the reasons I fell in love with nail art, her designs are just so damn good! Recently she did a new type of nail art which she calls the waterfall, I won't try to explain it to you because she put up a really great tutorial which you can see HERE, but basically you take your nail art brush and do simple, quick strokes from the nail bed towards the tip and it creates a waterfall-esque effect. It's quite stunning. So she's where I take my inspiration from today because I've tried some waterfall nails of my own!

To get this look I started with a base of OPI My Boyfriend Scales Walls and then painted two coats of ORLY Glowstick and then used Lime Crime Lavendairy, Maybelline Color Show Iced Queen, Maybelline Color Show Plum Paradise, and Sally Hansen Golden-I for the stripes. 


It's not nearly as crisp as any of hers but I'd say it's a pretty solid first try ;) I really love the effect though, it's so simple really but it can look so complex at the same time. Oooh look at me getting all deep and stuff! LOL But really, I know I'll be revisiting this nail art soon because it's addicting! 

Don't forget to tell me about your blogs guys! I don't usually allow links in my comments but link away today!! :) 

Thanks so much chickies